Imagine this: you’re looking forward to a relaxing, steamy hot shower after a long day, only to discover the heater pilot isn’t working. Don’t fret about it, though.
In this article, I’ll show you how to light a pilot on a water heater. It’s a straightforward process, and I’ll ensure you get that hot water flowing while doing it safely. Let’s dive in!
How to Light a Pilot on a Water Heater
Before jumping right into the action, it’s best to review the water heater instructions.
Typically, most models come with a label providing step-by-step guidance on the lighting process. You’ll find a diagram explaining the components and their respective locations.
Taking the time to familiarize yourself with these instructions is not only a wise safety measure but also ensures a seamless process.
After you read the guide, here’s what you need to do:
Step 1: Gather the Necessary Tools
Lighting a gas water heater’s pilot is a straightforward process. It doesn’t require many tools. All you need is a flashlight, a screwdriver, and a long lighter.
Some models even don’t require any equipment to light the pilot. Aside from that, make sure to wear safety goggles and gloves.
Step 2: Take Safety Precautions
As you know, a pilot light is a small flame that keeps burning to ignite gas appliances like furnaces and water heaters.
When you turn on the heater, a control valve releases more gas, which the pilot’s flame ignites. So, the process involves many fire hazards.
According to the National Fire Protection Association, water heaters account for 5400 home fires annually. That’s around 10% of total fires caused by heating equipment.
For that reason, you need to take extra measurements to ensure your safety. These include:
- Wear safety goggles, gloves, and flame-retardant-treated clothes
- Remove any flammable materials from the surroundings
- Work away from combustion chamber openings to be safe from any flame rollout
Step 3: Check for Gas Leaks
Aside from the tips above, checking for gas leaks is vital for your safety. That’s especially true if the pilot light went out by accident.
In that case, the gas used to keep the flame burning can vent into your home. Once it reaches certain concentrations, between 5 and 15%, it ignites, causing explosions.
That’s why it’s essential to check for gas leaks before you relight the pilot. Here’s how:
- Follow your gas pipe until you find a ball valve
- Turn the valve from a perpendicular position to a parallel position to open it
- Wait for 10 minutes or so to see if you smell gas. If that’s the case, stop working and call a professional
Step 4: Switch Off the Gas Valve

Once you ensure there are no leaks from the pipes, it’s time to turn off the gas supply to your water heater by switching the gas knob off. If you can’t find it, here’s what you need to do:
- Snap off the cover panel or use a screwdriver to remove it to access the gas valve
- Use a small plastic zip bag to keep the screws so that you don’t lose them
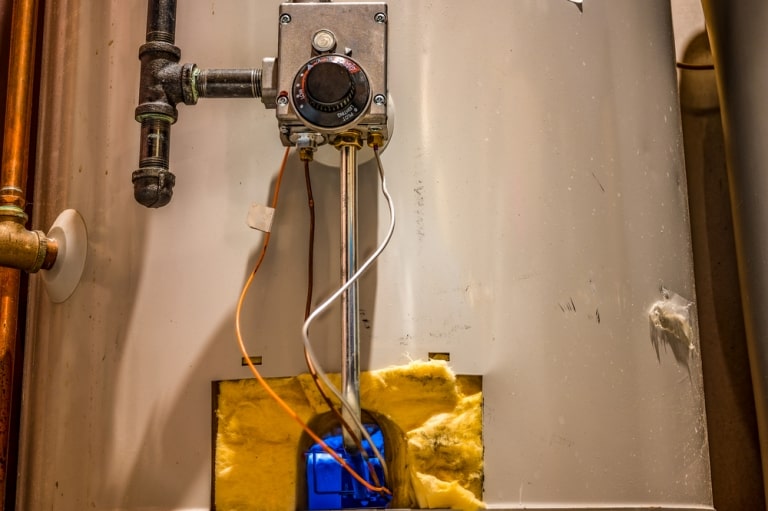
- Locate the gas regulator. It’s usually next to the temperature control valve. Use a flashlight if necessary
- Turn the gas valve until it’s in the “off” position
- Wait 10-15 minutes to allow residual gas to clear from the tank
Step 5: Turn the Gas Valve to the Pilot Position
Near the gas valve, you’ll see a temperature control knob. Make sure to turn it off to stop it from entering safety mode.
When you fail to light the pilot three times, the former mode will prevent you from continuing with the ignition process.
To avoid this issue, wait 10 minutes or more after you switch the temperature knob off. Then, set it to the lowest temperature and switch the gas valve from “off” to the “pilot” position.
You may need to keep holding the switch in that position if you have an older water heater.
Step 6: Light the Pilot
After following the steps above, all you need to do is light the pilot! Now, there are a couple of ways to do that, depending on the model you own.
For older water heaters, you need to use a long lighter or a match.
Once you have any of them on hand, press the round red button next to the control dial to start the gas flow—you should hear a hissing sound in this step. As you keep holding it, place the long lighter into the combustion chamber at the bottom to light the pilot.
Instead, use the ignition key if you have a newer model. Simply press the red button and then depress the igniter. Repeat this process several times until you see a flame.
Step 7: Reset the Temperature setting and Cover It
Once you relight the pilot, wait about a minute before letting go of the buttons. All you have to do now is switch the gas regulator from “pilot” to “on.”
Additionally, reset the temperature setting. However, avoid going beyond 120ºF, as that increases the risk of scalding or troublesome burns.
With the pilot light on and your water heater working smoothly, put your cover back on, and you’re done!
Troubleshooting Common Pilot Light Problems
If you’ve tried the above steps and your pilot isn’t working well, there’s probably an underlying issue.
Here are common pilot light problems and their possible causes:
1. The Pilot Doesn’t Ignite
Several problems can cause a pilot not to ignite or stay lit. These include:
- No gas supply due to a faulty valve
- Clogged pilot orifice, the small hole that regulates gas flow
- Carbon buildup in the burner chamber. Cleaning it with a dry cloth or sandpaper should solve the issue
- Faulty thermocouples, wire connections, or other component defects. These problems require a professional’s help
2. Pilot Flame Is Too Large or Small
A large pilot flame is usually due to too much gas flow. This may happen because of a leaky gas valve or a problem with your gas company.
In contrast, a small flame may be due to low gas pressure. Other reasons include a clogged pilot light tube or a faulty water heater component. Either way, you should contact a gas technician to help fix these problems.
Wrapping Up
Knowing how to light a pilot on a water heater is not only essential for your comfort but also for preventing hazardous fires.
By following our step-by-step guide and taking the necessary safety precautions, you can keep your water heater operating every time the pilot goes out.
Remember to troubleshoot common pilot light issues early to ensure you enjoy a reliable hot water supply for a long time!


